|
The first day of digital photography I did not feel comfortable in my skills as a photographer. In fact, I was nervous, but as the first few weeks went by I learned about the important basic aspects of digital photography. I learned all about the exposure triangle and what it takes to get good exposure. My knowledge on shutter speed and aperture grew a very large amount, to the point where I felt very comfortable on manual mode now. It certainly took a while to get to the level of comfort that I'm at. I spent many weeks struggling with frame and too much light where every photo was washed out. But after experimenting all the time in class and when I would work on my weekly photo projects at home and learned how to fix these issues. I came up with my own tricks and tips to fix the mistakes I made based off of the knowledge I already had from class. Now my photos have a great mix of shutter speed, aperture, and ISO. To conclude this class was very helpful to my skills and a lot of fun! I learned a lot and had a great time being able to take photos around the school, playing around in photoshop, and learning so much in class! Before:
After:
Photoshop Assignments:
0 Comments
For this assignment we had to go around the school and take two portrait photos. We would take it in two different locations, hopefully both with good lighting, and two different subjects. Your goal was to have the subjects face have little to no shadows. If the place you were shooting in didn't have great lighting you would use this paper to reflect the light onto the person's face to lighten it. It was really fun and made me feel more professional!  In this project learned a lot about bouncing light to the right places and the correct frame for a Portrait. I had some struggles with getting a nice background with good lighting still but after figuring out where to get the light on the face it turned out quite nicely. I feel I excelled in the angles of my pictures, even though they weren't perfect rectangles.
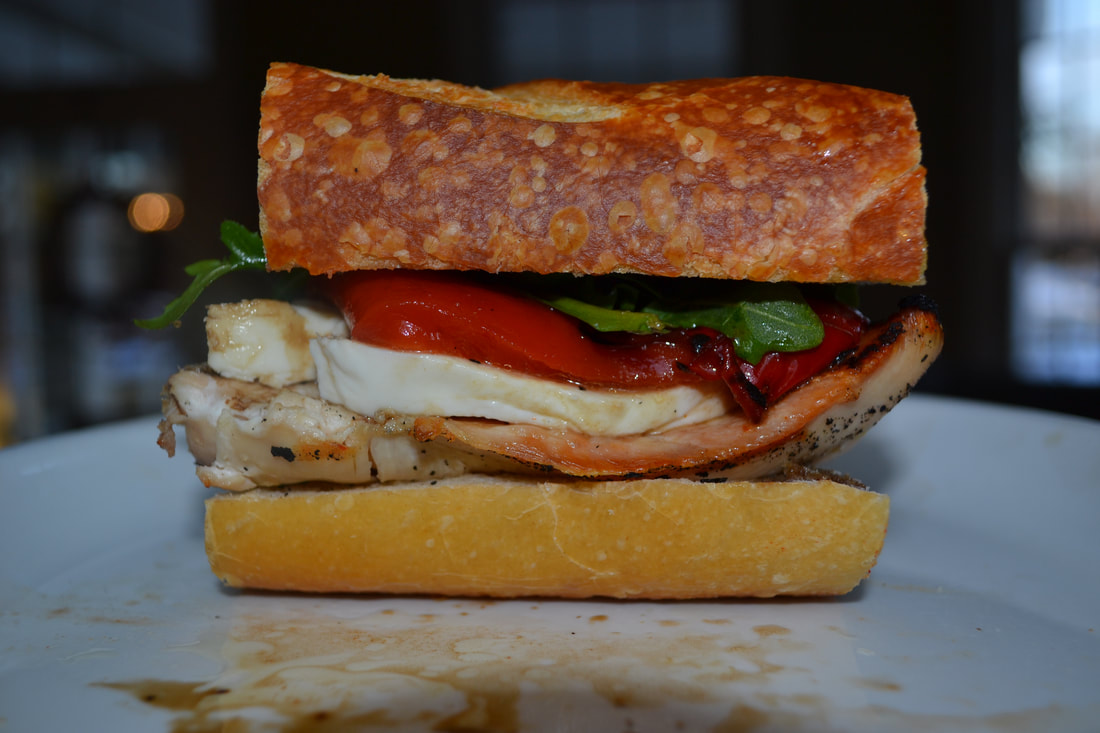
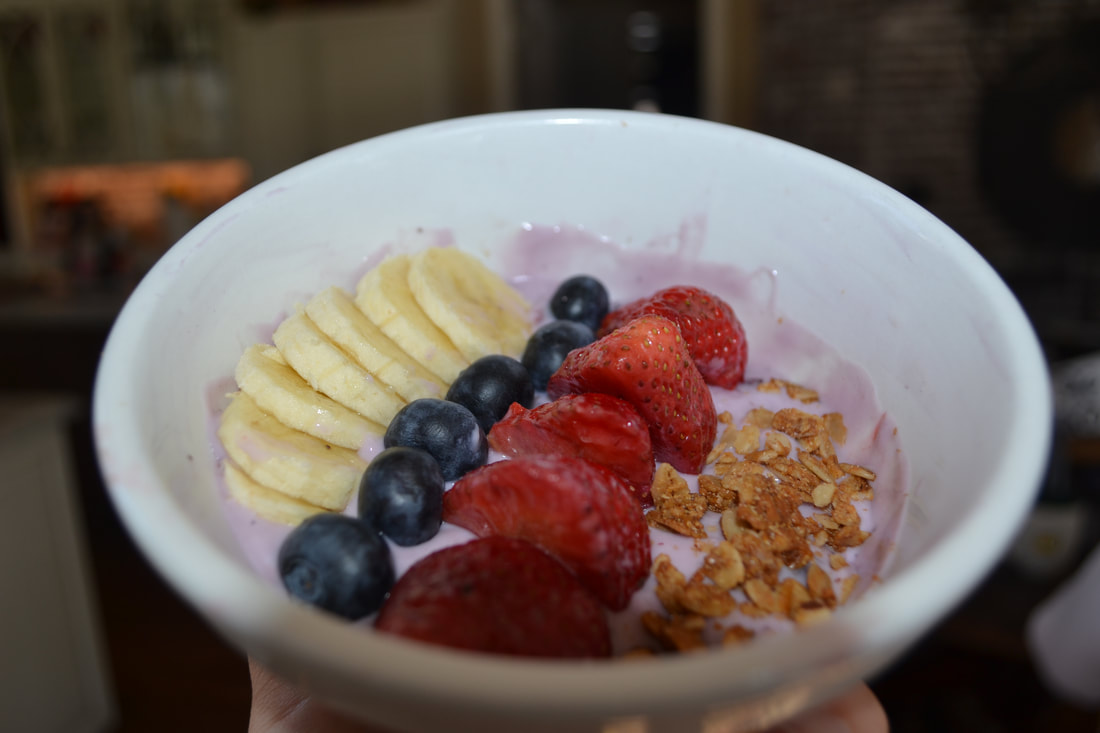
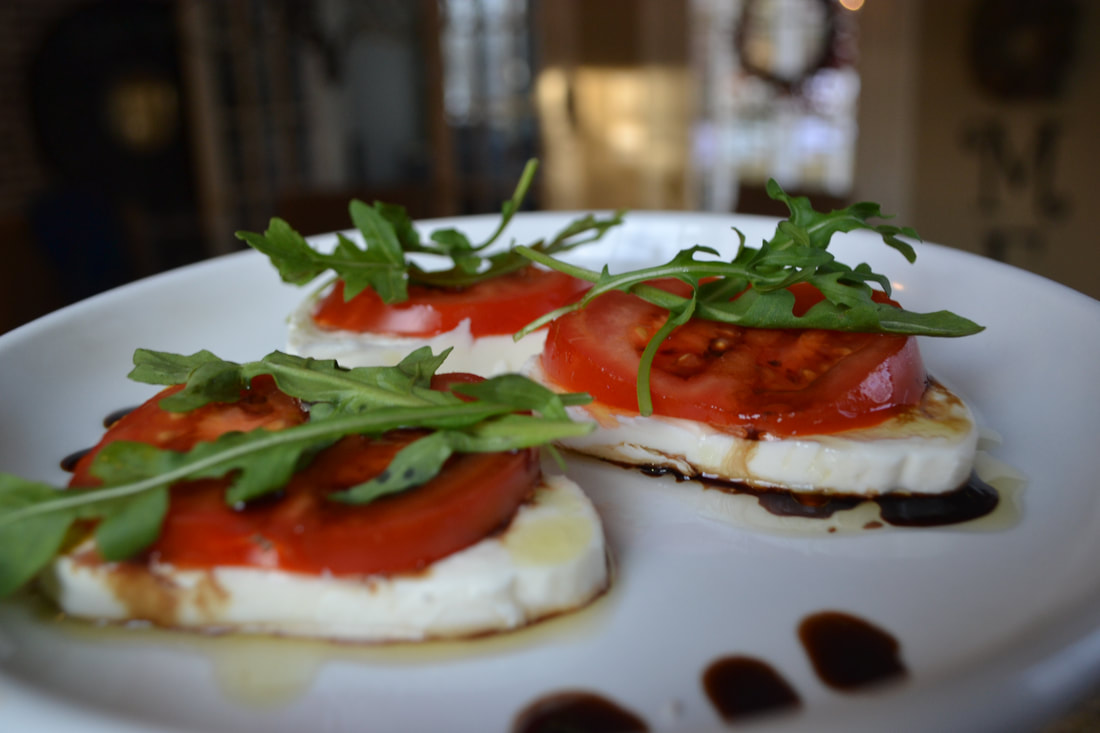
This weeks assignment I chose the category of food! This was such a fun project to do because I would make or buy food that looked very appetizing and get to take very artistic and creative pictures. Some of the photos I was able to set up the food and others were store bought but all the same they came out to be great photos! Take a look! 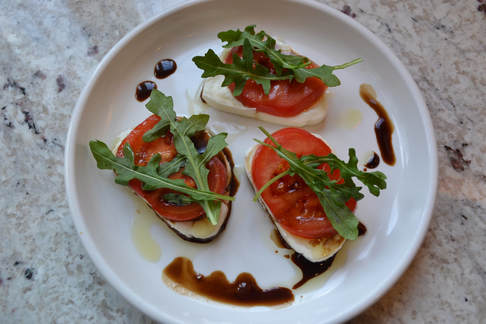 I did not edit this photo but the shutter speed is 1/100, has an aperture of 5.0, and an ISO of 400.
This project was fairly easy. My only main struggle was getting an appealing angle of the food, whether they were in a bowl or a plate. Also correct lighting was slightly hard but nothing too crazy. Because some of the foods were in bowls I had to tilt it towards a good light source so that it looks much more yummy! Things that went really well was the colors! The reds and greens contrasted so nicely in the sandwich and the mozzarella cheese was so well contrasted with the vinaigrette next to it. I really enjoyed this project and would do it again in a heart beat!
This weeks photoshop assignment we had to pick our own photoshop tutorial(s) and hopefully try some new tools and techniques with our own photos! This was a great opportunity for our class to try to use photoshop tools that we are interested in and to experiment in new ways. I choose two different photoshop techniques, water reflection and pile of polaroids. We all had to do a dash of color as well and I really enjoy how that one turned out! They were all slightly difficult so check them out and see what you think! DASH OF COLOR:
PILE OF POLAROIDS:
WATER REFLECTION:
I learned a lot from this lesson. So many new tools, tricks, and shortcuts on how to make new things in Photoshop. Although there was it's challenges. I would follow all the directions and it still wouldn't work for the water reflection but I had to use my new skills to work it out. For the polaroid it was very easy at the end even though the beginning was hard to follow. Finally the dash of color was a piece of cake without any problems at all!
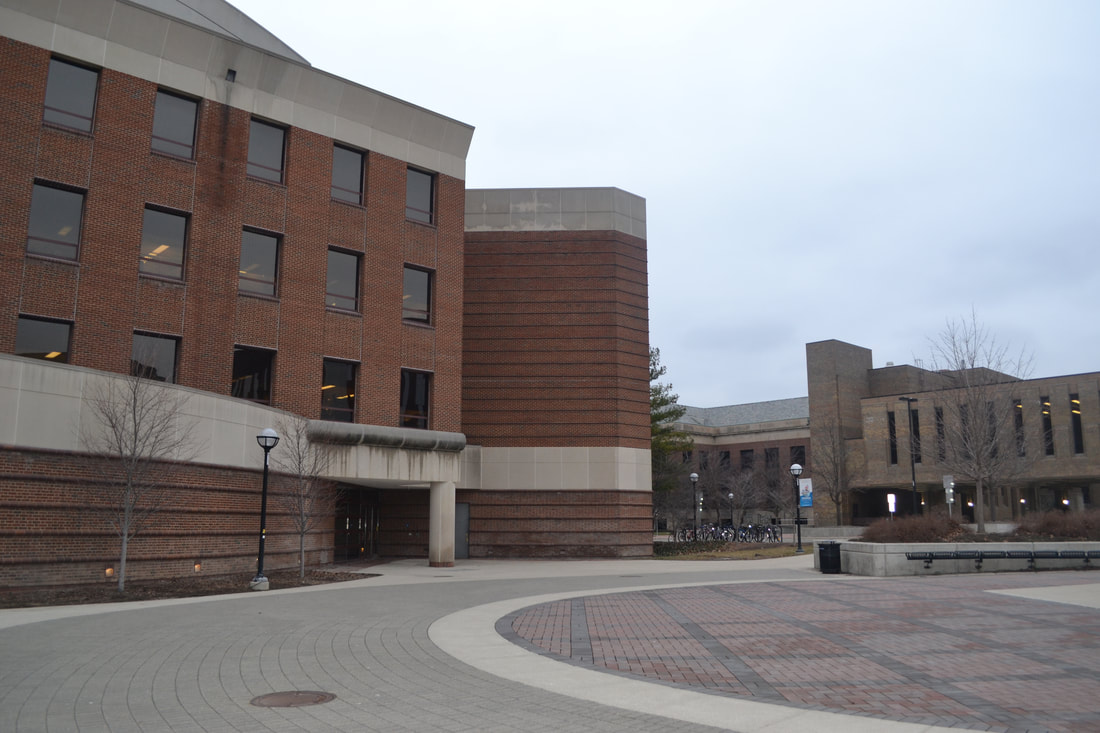
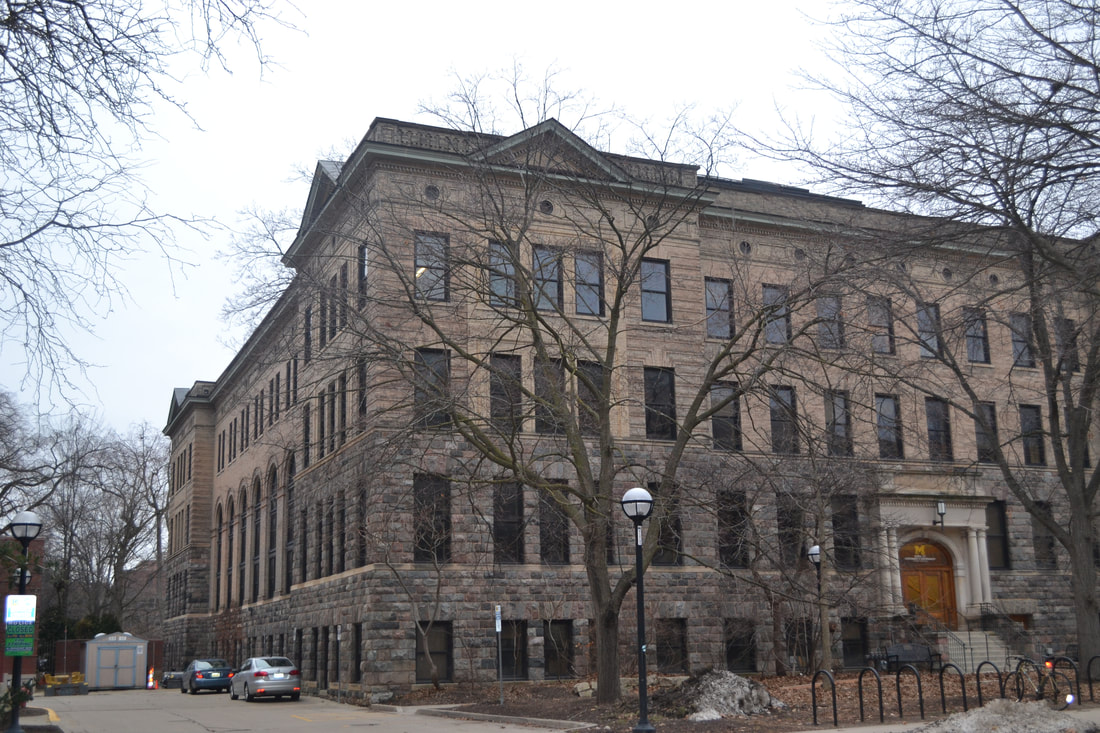
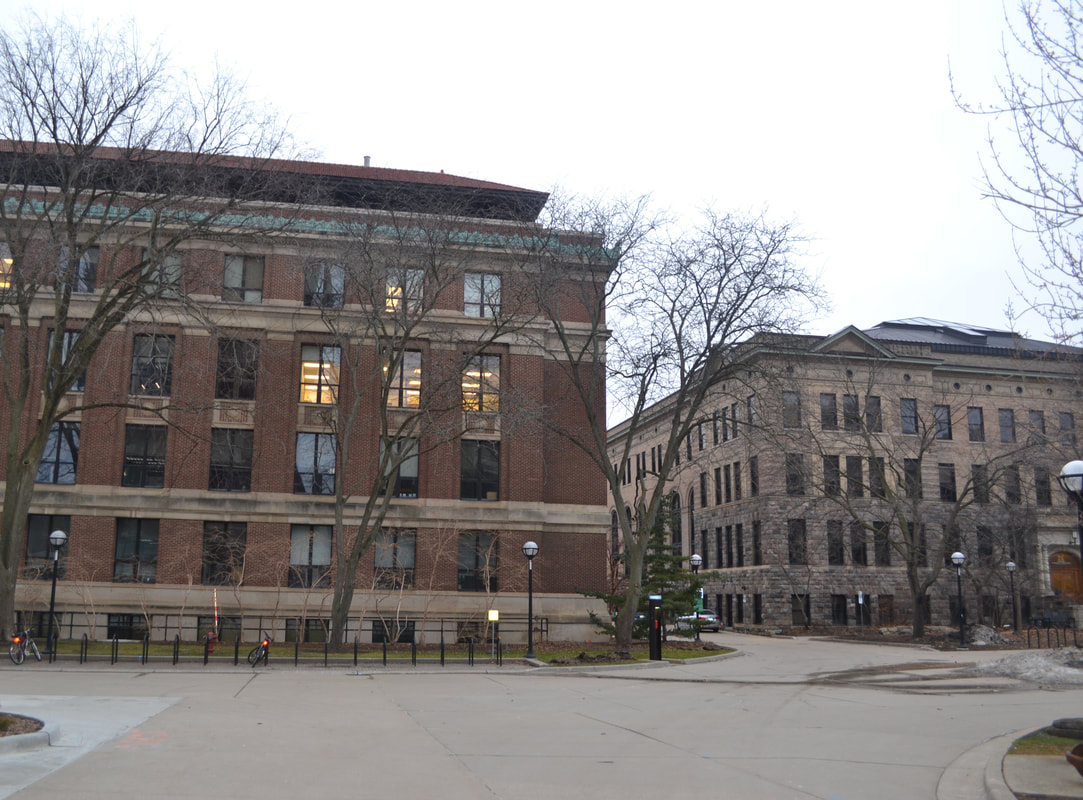
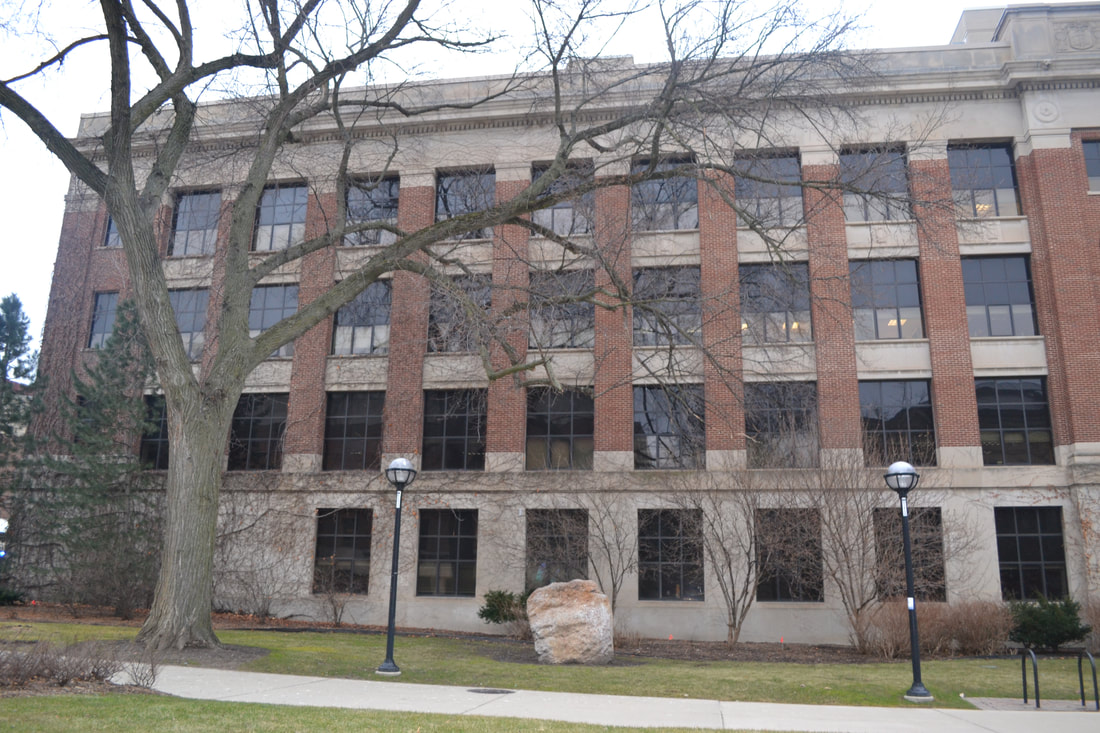
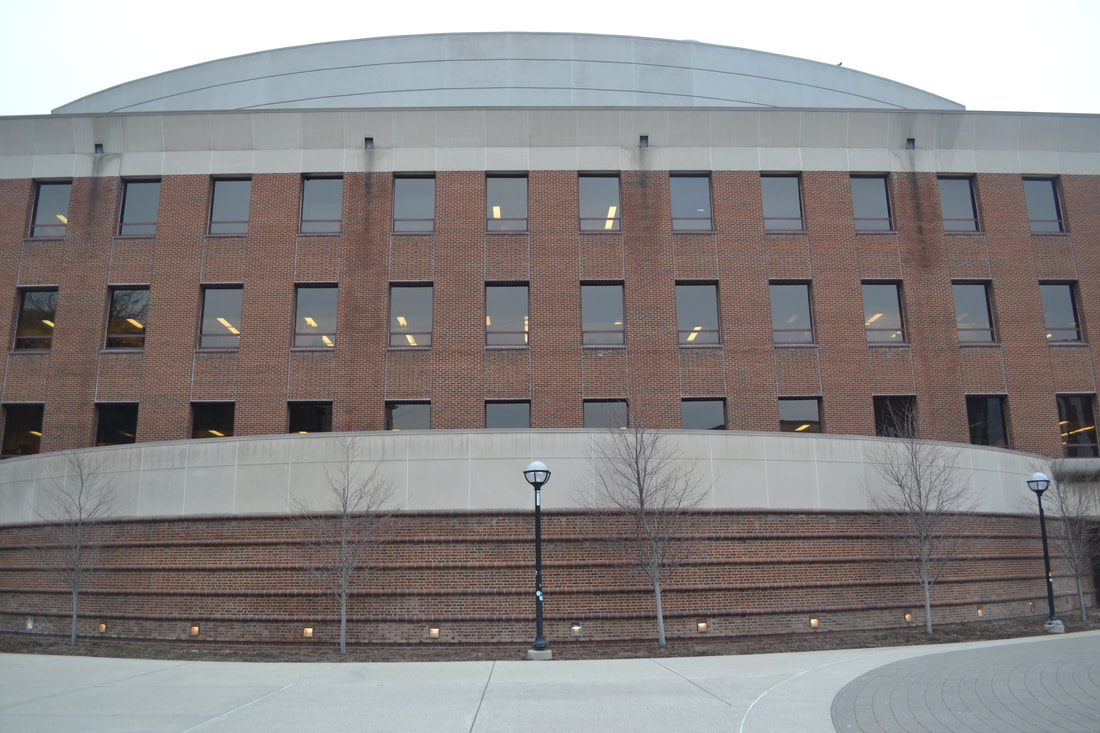
For this weeks photo assignment I chose architecture. I went into Ann Arbor and took some really cool pictures of the university's buildings. The buildings were covered in vines and shadowed by trees. They were all mainly brick and had stone sidewalks and made for nice pictures. I really like how they turned out, take a look! 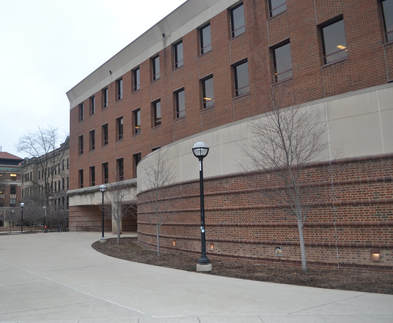 This is the photo I turned in and I made no changes to it. It has an aperture of 4.0, a shutter speed of 1/80, and an ISO of 400.
While taking photos I had some troubles with getting the whole building in the shot or the right amount, because with only some of the building in it the photo doesn't look right. After a while I found good angles with good lighting still. What went really well, in my opinion, was the use of the trees and vines in my photos. They could've been a distraction but I feel I used them in a nice way. Overall this project was fun and I am really happy with how this worked out.
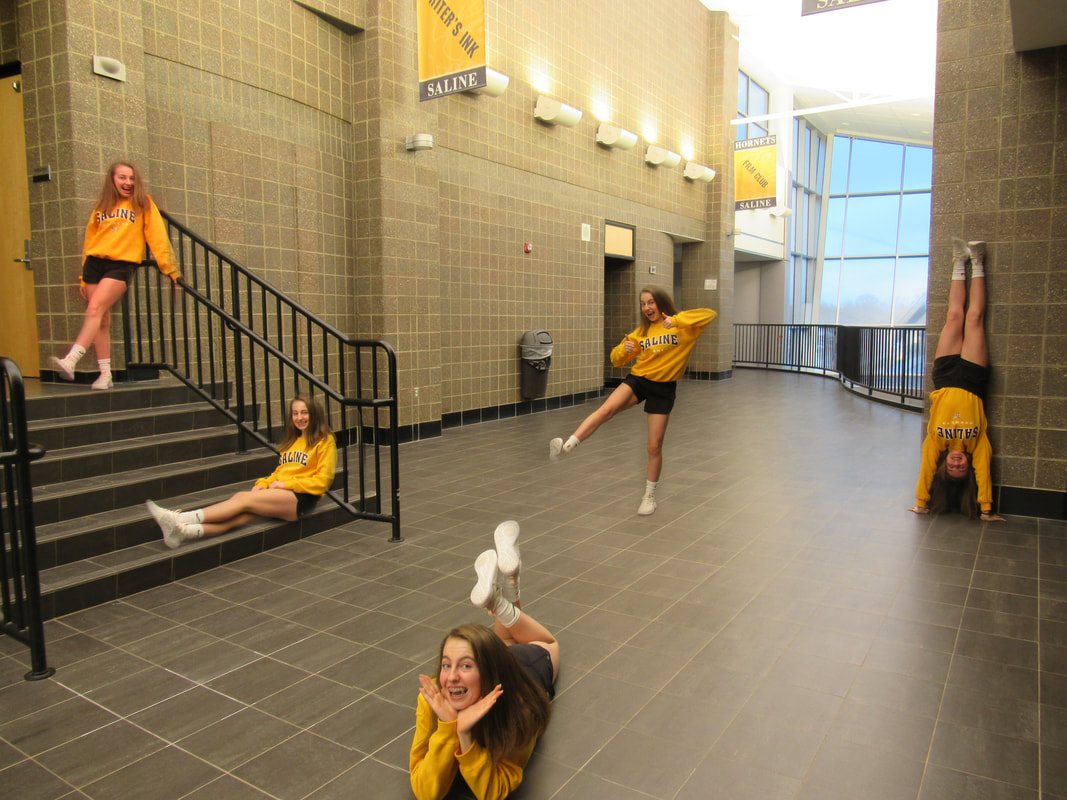
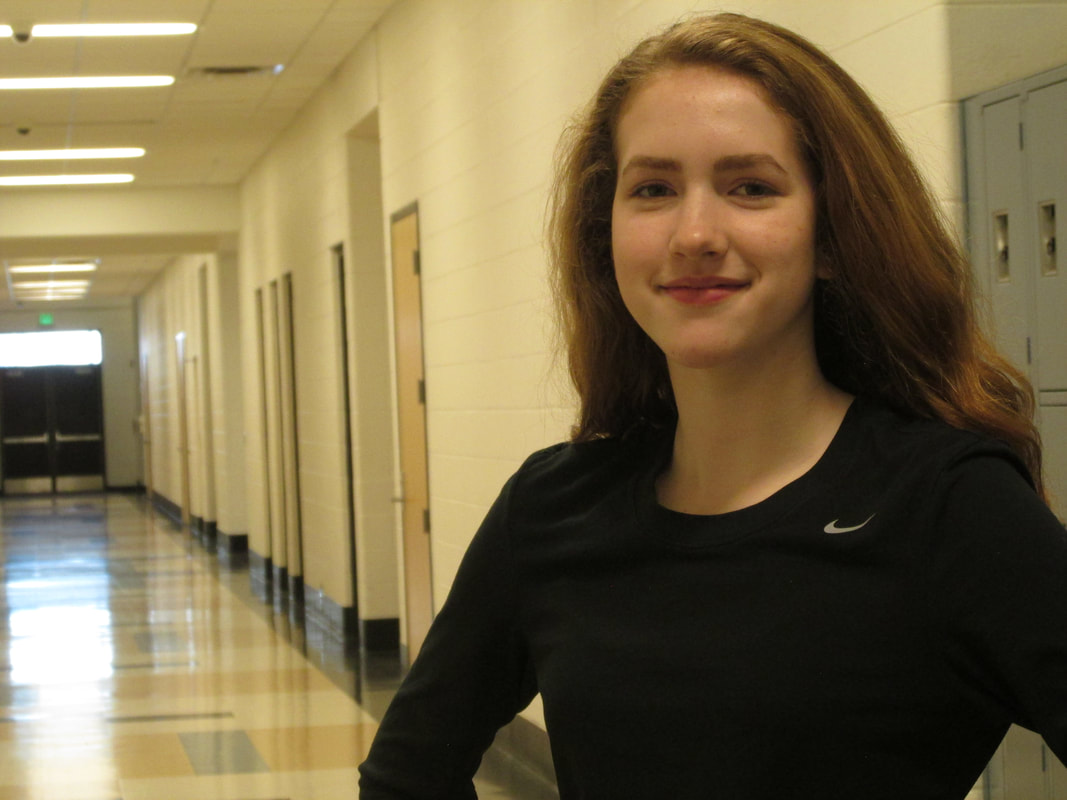
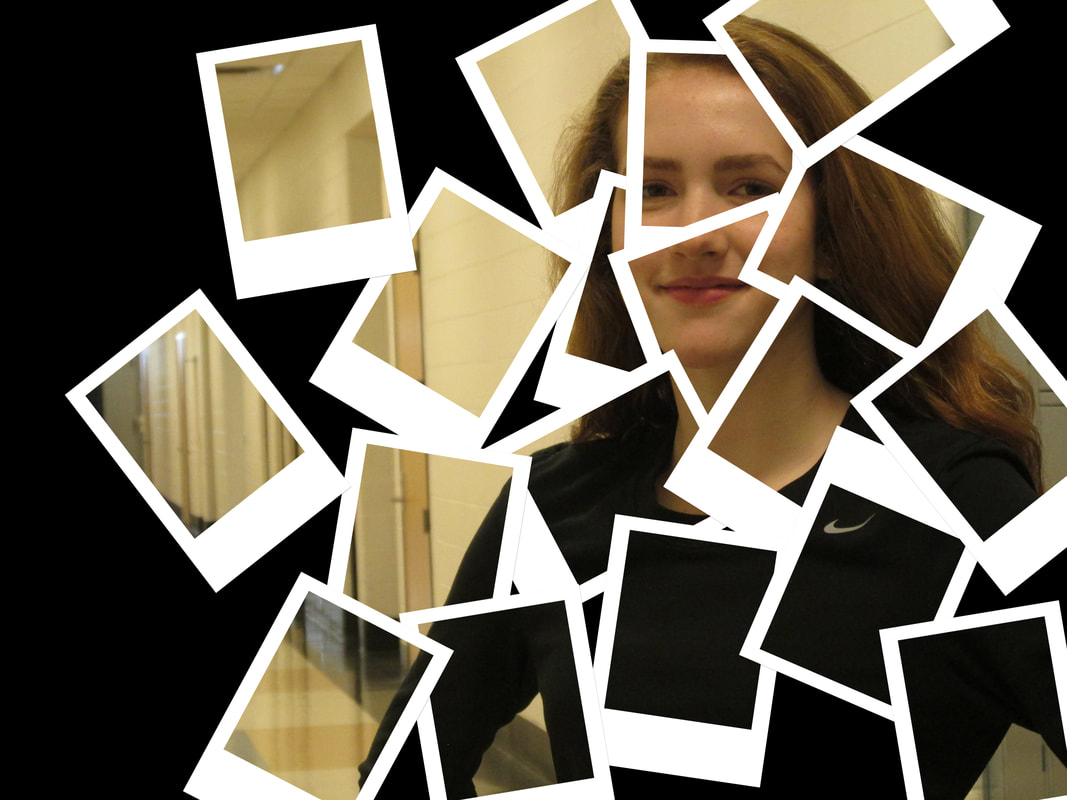
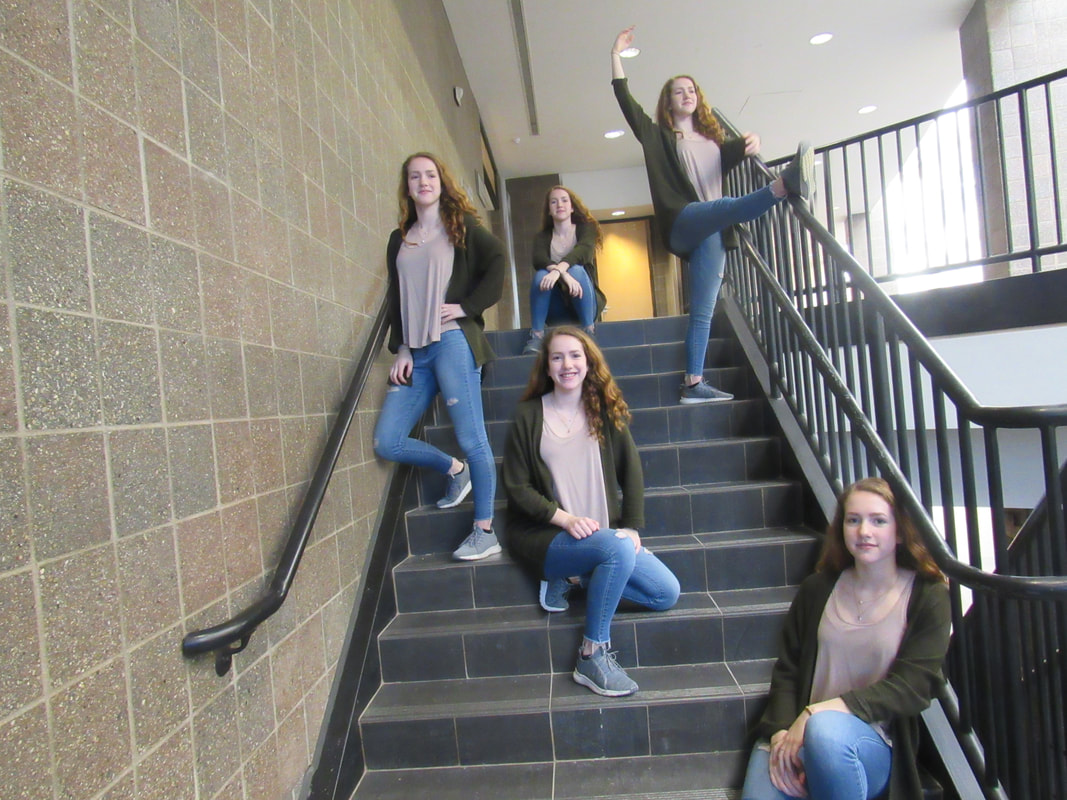
For this assignment we were supposed to create the illusion of 5 images of the same person in one image using photoshop. We had to go take pictures around the school and make sure that we used a tripod to not move the background. Then we had to take five photos with the same background, upload them to our computer, and stack them. After stacking the photos we would mask each layer and then touch up the edges. I feel this assignment was pretty easy, but very fun! I feel it went very well, check it out!
The only struggle I had with this photoshop project was taking the photos. It was hard to find somewhere that wouldn't wash it out and with enough room for the tripod. Also, I had to make sure the tripod wouldn't move and tried to make the photos as little blurry as possible. Other then that all things in photoshop went well and I really understood everything that was happening. I feel my skills and knowledge in photoshop is growing and each assignment gets easier!
For this assignment we had to take a picture of somewhere in the school, like the commons, gym, or hallway, and turn it into something else by photoshopping and cutting and pasting certain things to follow a certain theme of your choice. I choose star wars and took a picture or our school store, the Edge. I changed the windows into outer space and added a bunch of spaceships. Then outside of the windows I added Darth Vader, Yoda, and some boulders. I think it turned out pretty well, take a look! 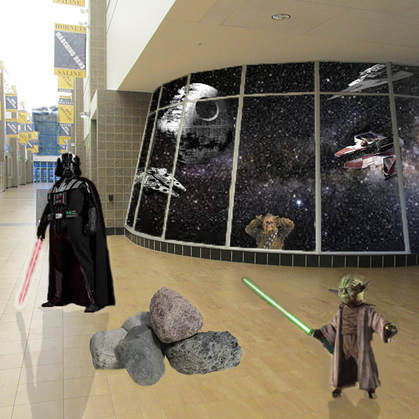 During this assignment I learned the short cuts in basic photoshop. Like the easier ways to select and zoom. I also learned how to make shadows of an added figure. I also got better acquainted with the tools of photoshop. Such as, paint, quick select, and crop. I had trouble with making clean lines, but learned how to soften the pixelated - ness. Overall, it was a good project and I feel my skills were taken to the next level.
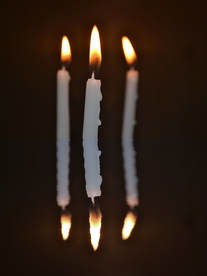
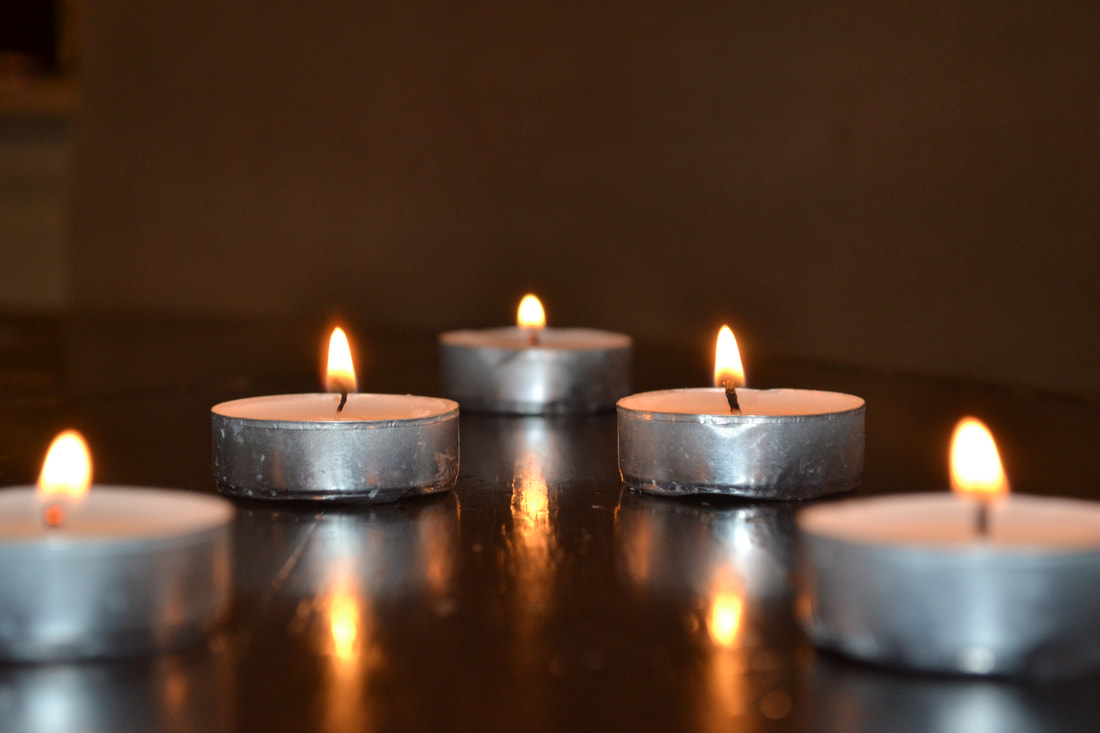
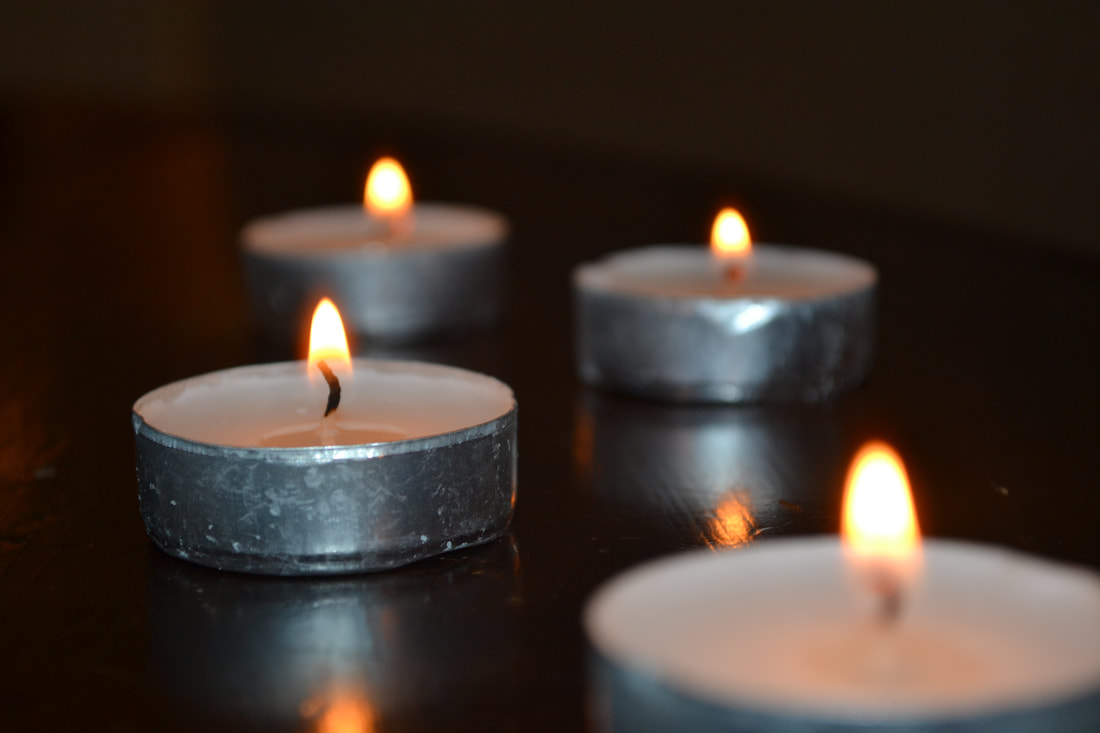
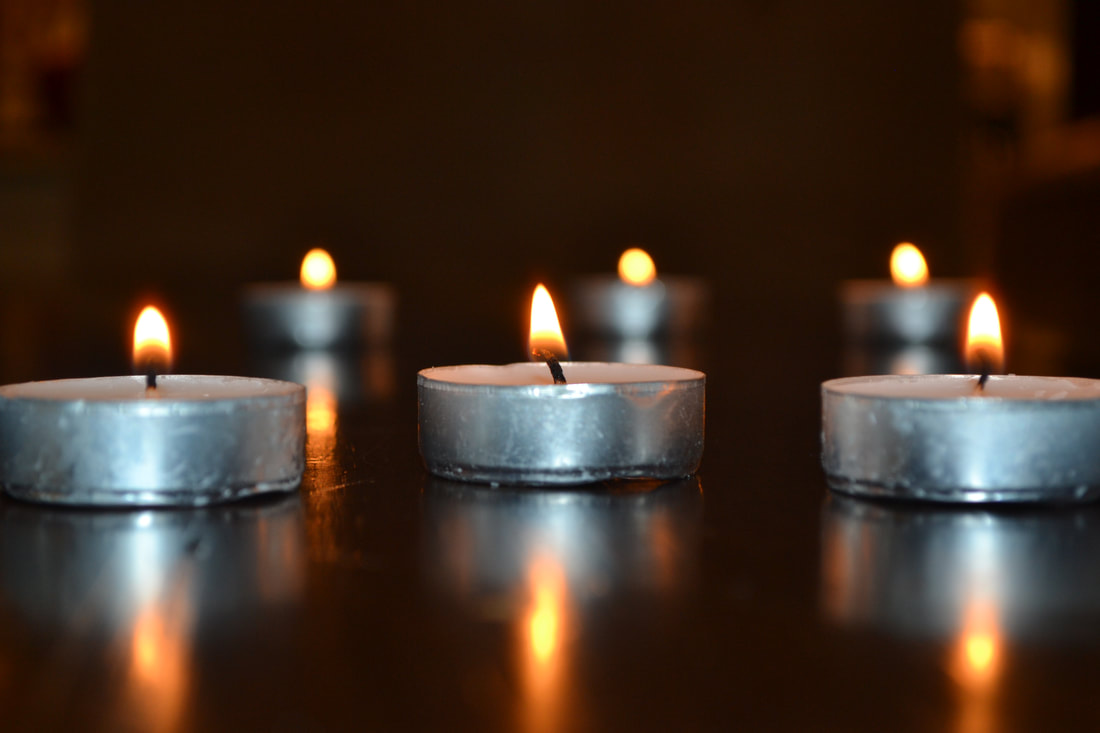
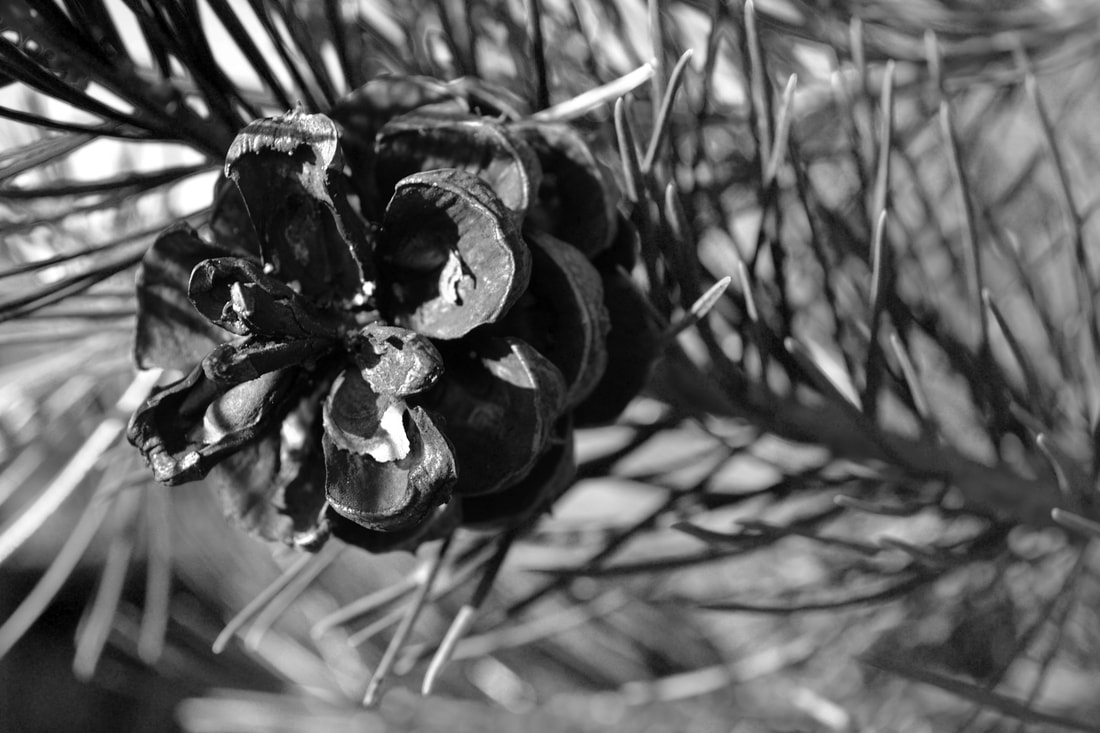
For this weeks photos I choose the topic of still life. It took me a while to think of an idea that would have different depth of fields, but eventually I decided to go with candles. I set them up in different ways and focused in on different candles. I also set up a pretty plain background so that it wasn't too distracting. I think it turned out really good. Check it out! 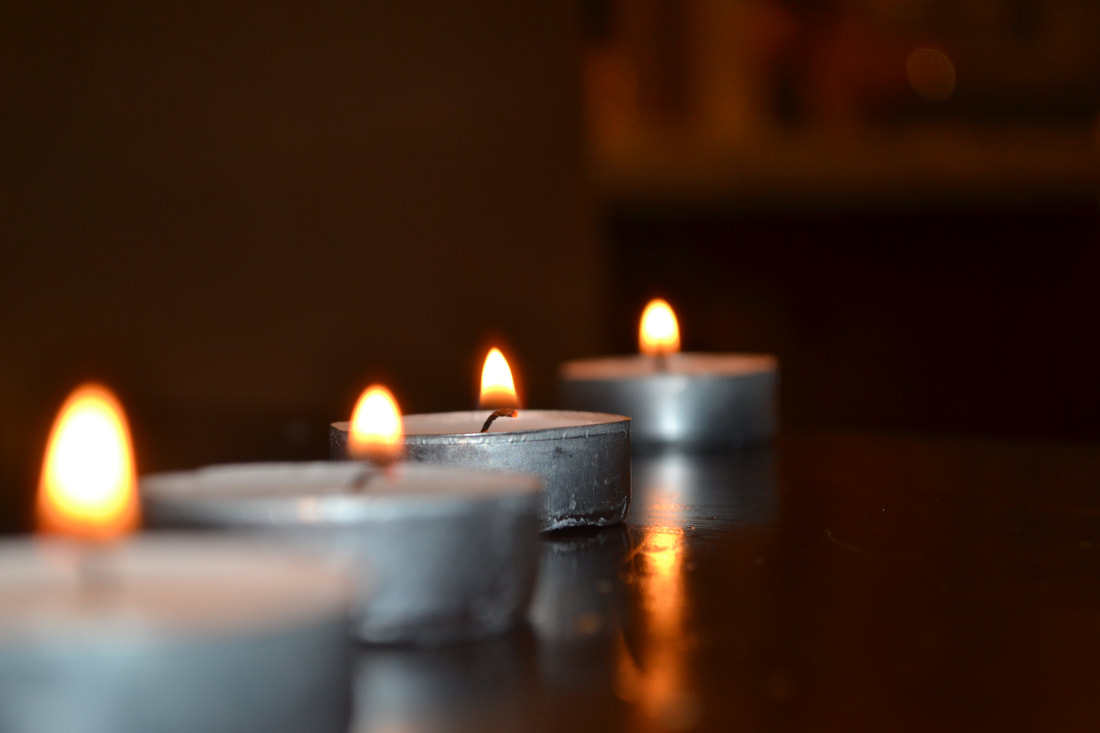 This photo has a aperture of 5.6, a shutter space 1/60, and an ISO 400. I made no changes to any of my photos.
This assignment had it's ups and downs. Some struggles were getting the camera to focus on one candle in front of others. After while I figured out the correct way to place everything to make it work out. I had to have the candle just the right distance from the camera and the other candles behind it. Some things that worked out was making the light from the candles blur in the background. I really like how it looked and that was exactly what I was going for. Overall I'd consider this assignment a success.
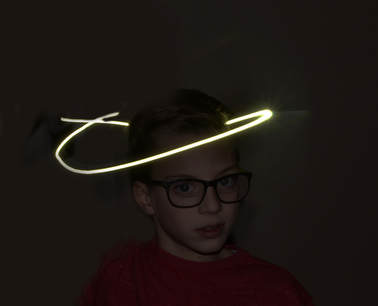
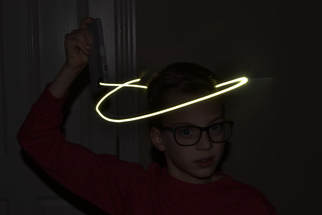
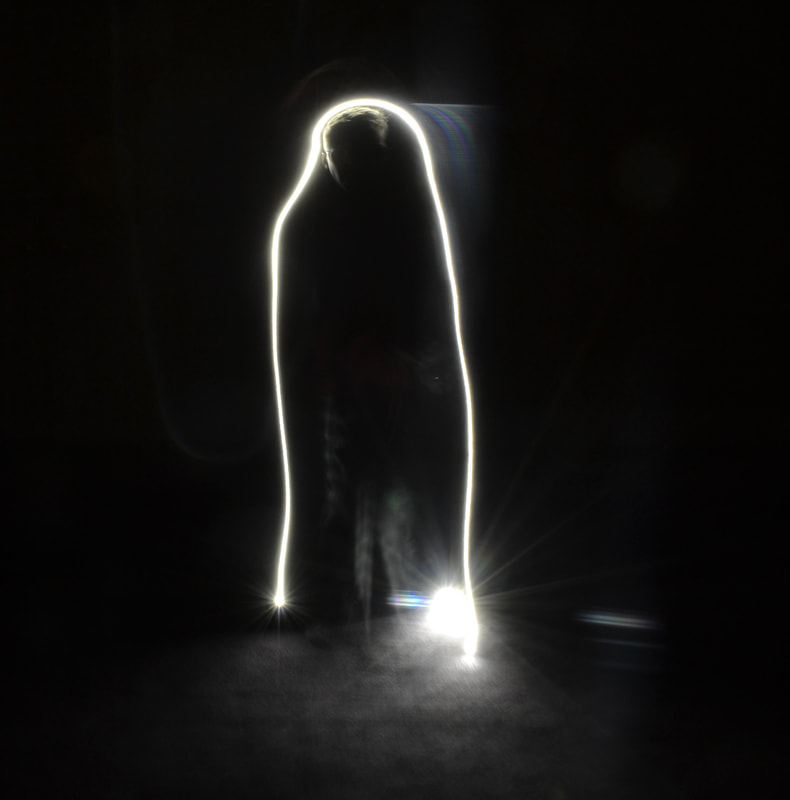
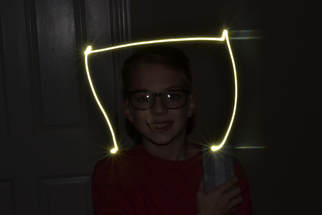
For this weeks photo I had to try and take photos on slow shutter speeds to let the image capture a design made with light. It was very difficult to get the right lighting in the picture for the light painting to appear clear, but I worked out in the end. I also had to make it apparent that a person was there by outlining there body or face. I had fun with this project and I feel I did well given it's difficulties. Check it out!
This photo has an F-stop of 22, a shutter speed of 2 seconds, and a ISO of 200.
Light painting is very fun to do and experiment with, but don't let that fool you. It is very difficult to get the right amount of light to see the face without washing the photo out. Also I had trouble with the correct shutter speed times to make the light painting more detailed but not blurring the main focus, the person in the photo, at the same time. After a while I figured out the right times for the right lighting. I felt the designs went well and I had a lot of fun with this project.
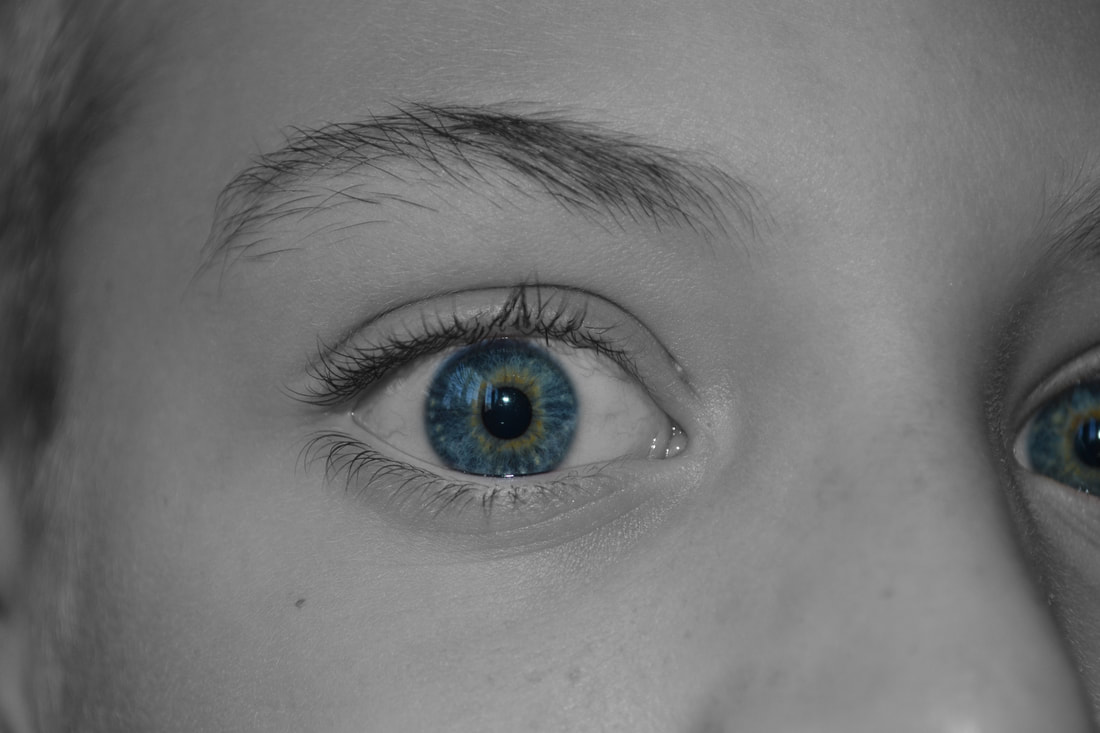
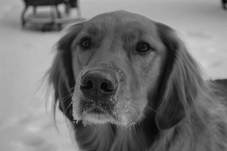
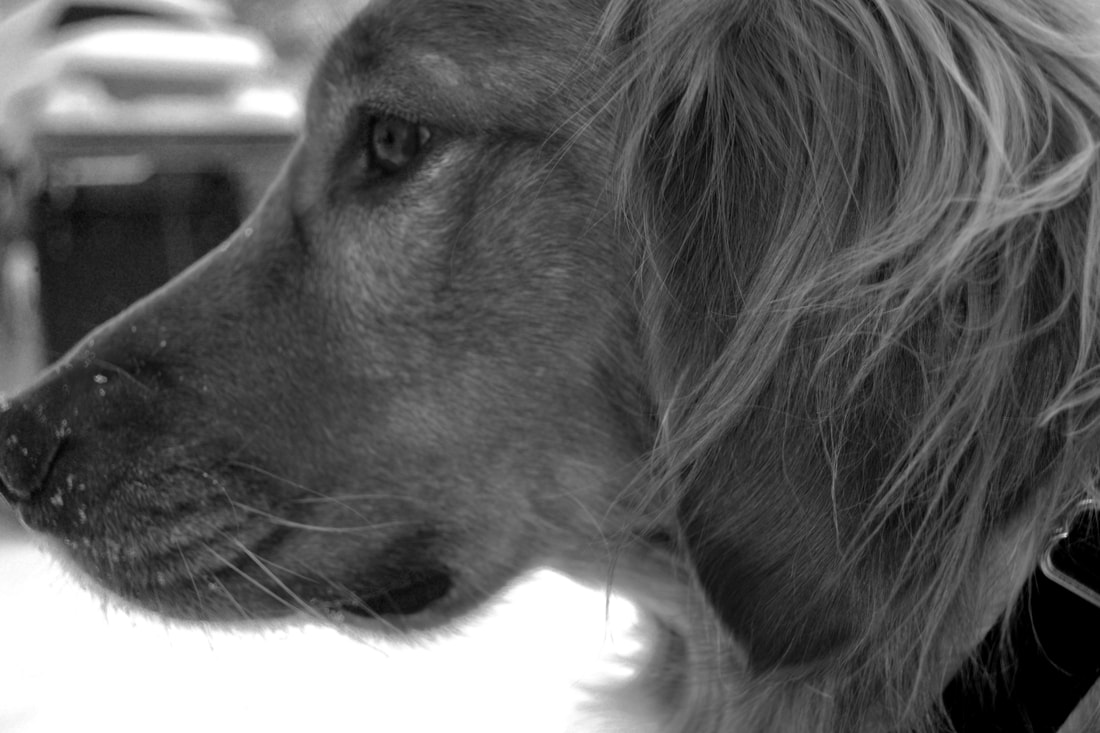
This week we had to fill another one of the categories with photos the fit the requirements, since i didn't have enough time this weekend to take pictures, so I made my old pictures black and white. I had to choose photos that had the right lighting and focus, go into photoshop and adjust the coloring of the photo. It went pretty well! 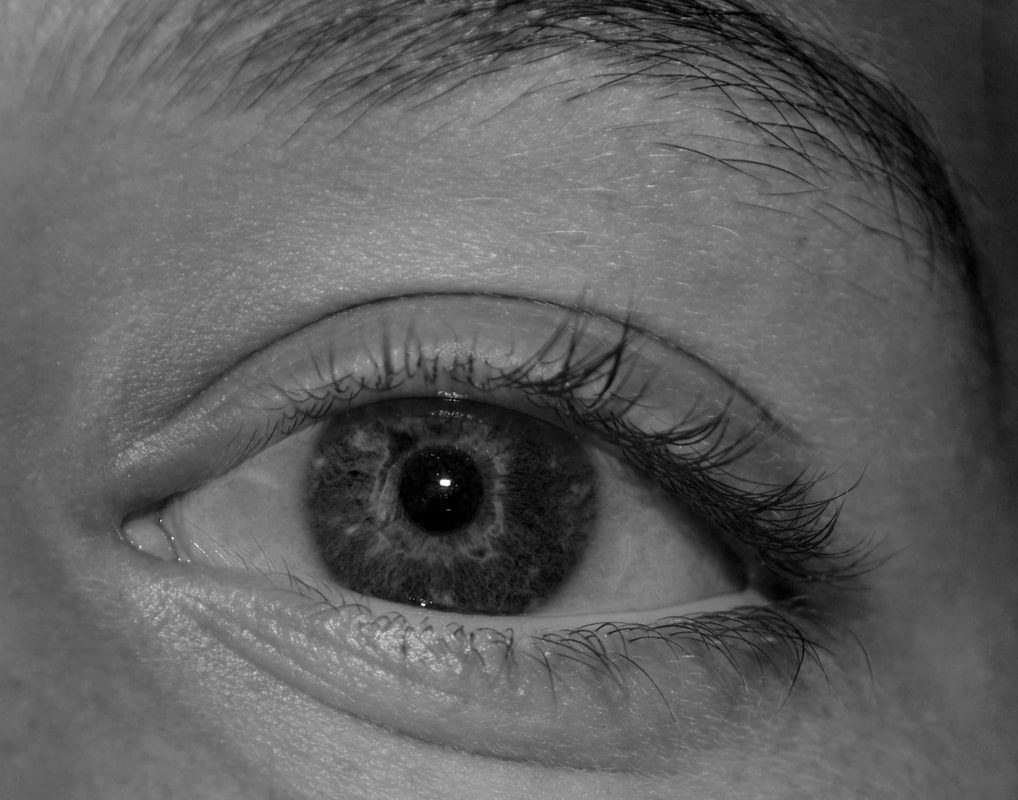 This photo has an aperture of f5.6, a shutter speed of 1/60, and a ISO of 220. I did crop this photo closer to the eye to have the focus of the photo be on the eye.
My main struggle for this weeks photos was finding photos with the right lighting to make black and white. Then once I found the right photos I had to adjust it to look right and normally colored. What I feel went well was the coloring of the photos, as long as they had good lighting the coloring went very well for me. It may have taken a while to find out why the photos weren't looking right, but once i figured it out I feel the project looked great and I'm happy with the results.
|